Contents:
As teachers across the country find themselves looking to the start of a fresh academic year, many of them will be setting up and organising new class Teams and Class Notebooks – a legacy of Covid, but one that for many teachers seems here to stay.
As a long-term user of Teams and Class Notebook, I want to share with you, step by step, how I’ll be organising and using mine. If you haven’t used Class Notebook before, now is your chance. If you have, then hopefully you’ll find some interesting new ideas to try out.
Organising the Content Library
The Content Library is equivalent to a traditional file or binder, with different sections and pages. For my own Content Library, I divide it between texts that I teach, like this:
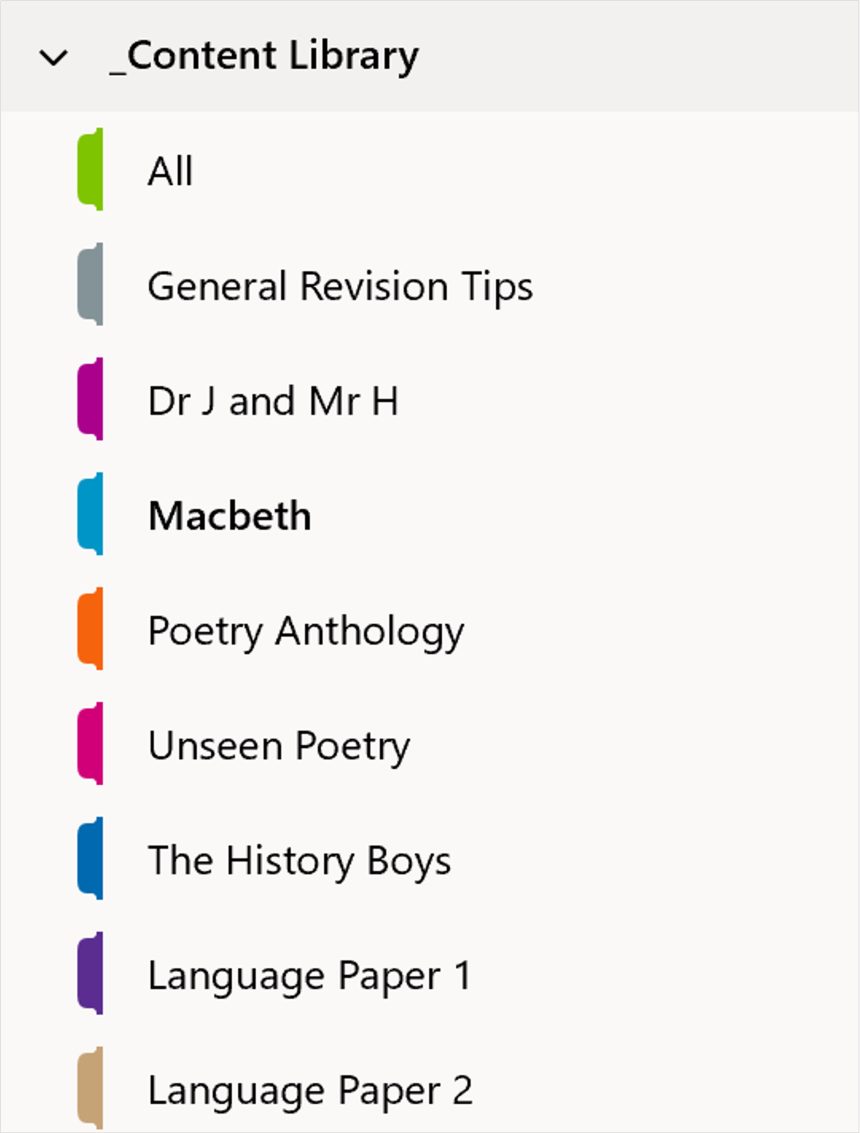
Within each section, I upload any resources, worksheets, PPTs or booklets that I want students to access. You could also use this space to link to various relevant media, whether images, YouTube videos, or podcast episodes.
Here’s an example from the Macbeth section of what might be included:
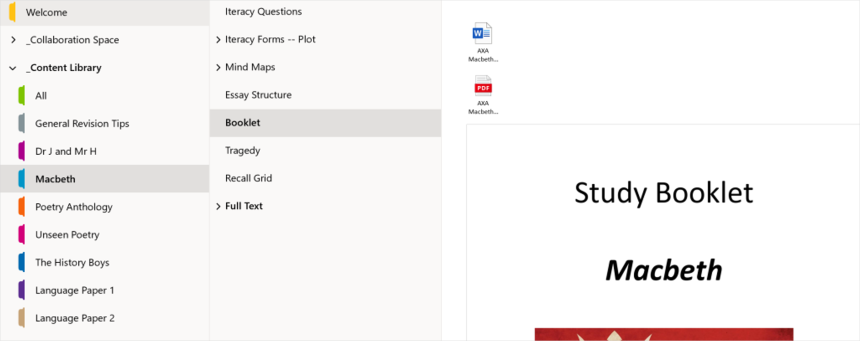
The ‘All’ section is where I place things that are not text-specific, such as analysis bookmarks or course overviews. When uploading these resources, you can attach them as a file or, as I do, use the ‘printout’ function (found in the Insert tab) that effectively uploads them as a PDF. You can see what this looks like in the way my Macbeth booklet has been displayed above: the entire booklet is a visible PDF.
Reverse Engineering
This is just the name I give to thinking about and using model answers. Given how crucial this is more generally, I have a specific section for storing and sharing all my model responses, whether they are ones I have written or ones I have collected from students.
As with the Content Library, I divide this section into the texts I teach, as below:
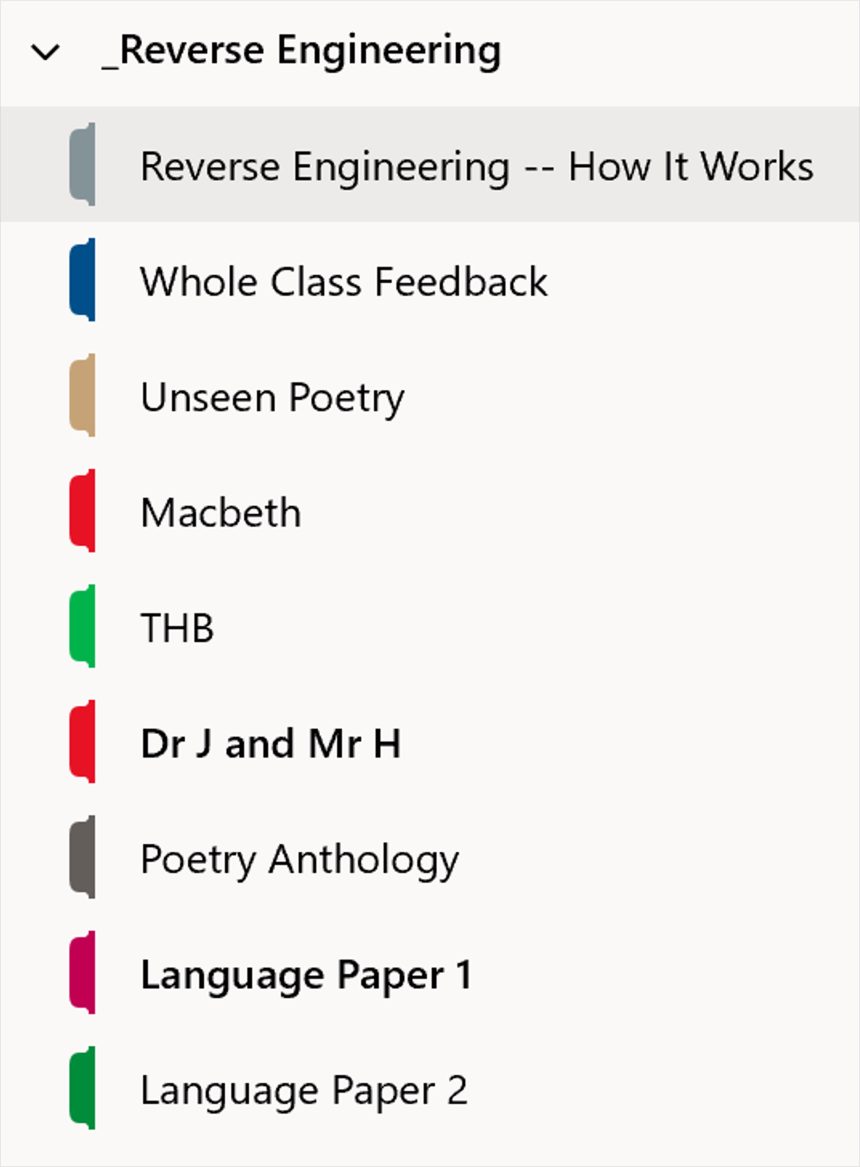
The way I upload these is via Office Lens which takes a document photograph of the essay. I can then save it as PDF and send it straight to Class Notebook. I also use this space to store all past paper questions, or ones I’ve created, so that students have easy access to these.
It is also possible to live model or live mark in Class Notebook, either by typing or digitally inking. You can easily share your screen so that students can see you doing this in live time.
Offering feedback
If a significant amount of work is being created and reviewed within Class Notebook, then you can also offer feedback through OneNote too. You can do this by simply typing next to the work (if you’d like to leave personalised comments), by uploading a WCF sheet and making it accessible to students, or even by leaving a voice message next to the work that can then be played by the student, as below:

The lesson itself
Up until now we’ve mostly considered how to use Class Notebook to support your teaching, but it can be put to use within the lesson itself.
You could, for instance (and rather than using a PPT) organise the content of your lesson directly into Class Notebook, whether it is lesson instructions, Do Now, recall questions, or a worksheet you want to complete with your students. Indeed, a single page could become the worksheet/lesson where you write instructions or include relevant images/text, zooming in and out as necessary during the lesson. This can all be manipulated in real time and your screen shared.
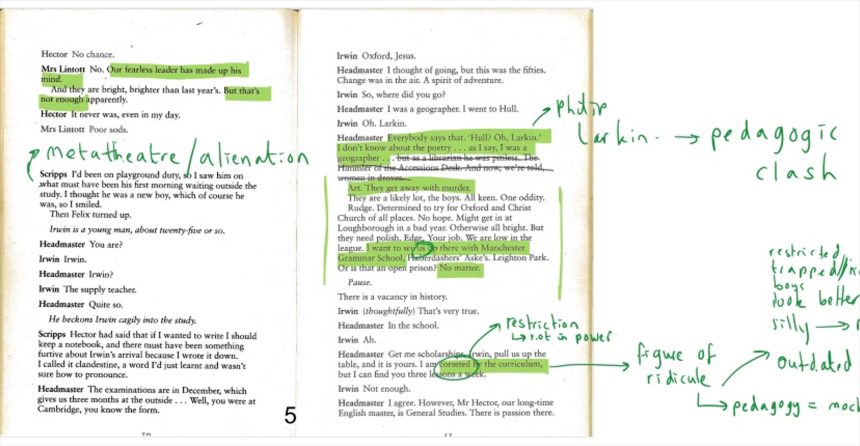
You could also upload a PDF copy of a text and annotate along with students via OneNote (if you have the capacity to digitally ink) rather than use a visualiser, like this:
Looking ahead…
Whilst Class Notebook and Teams gained national educational prominence during the pandemic, they have a place in classrooms even without the pressures of Covid. Hopefully, this article has outlined just some of the ways it could be used in teaching and the value it may add.





Comments